Setting up email
Copyright © 2026GotoAI Inc.Based on the goose project
The desk sends email to tell the requester that a diagnosis report is ready, and to tell the administrator about the turning points of its processing. There are two things to set.
| Setting | What it is for |
|---|---|
| Always-Receiving Email Addresses | The address the administrator receives on. Registering one is required |
| Sending Email Account | The account the desk sends from, over SMTP |
Without both of them the desk will not start. It is what stops a desk from accepting a request and then having nobody to deliver the result to.
Right-click 「補助金診断デスク」, choose Settings…, and scroll down in General to Email Notifications. Anything not yet set is marked 「(*設定未完了)」 — not finished.
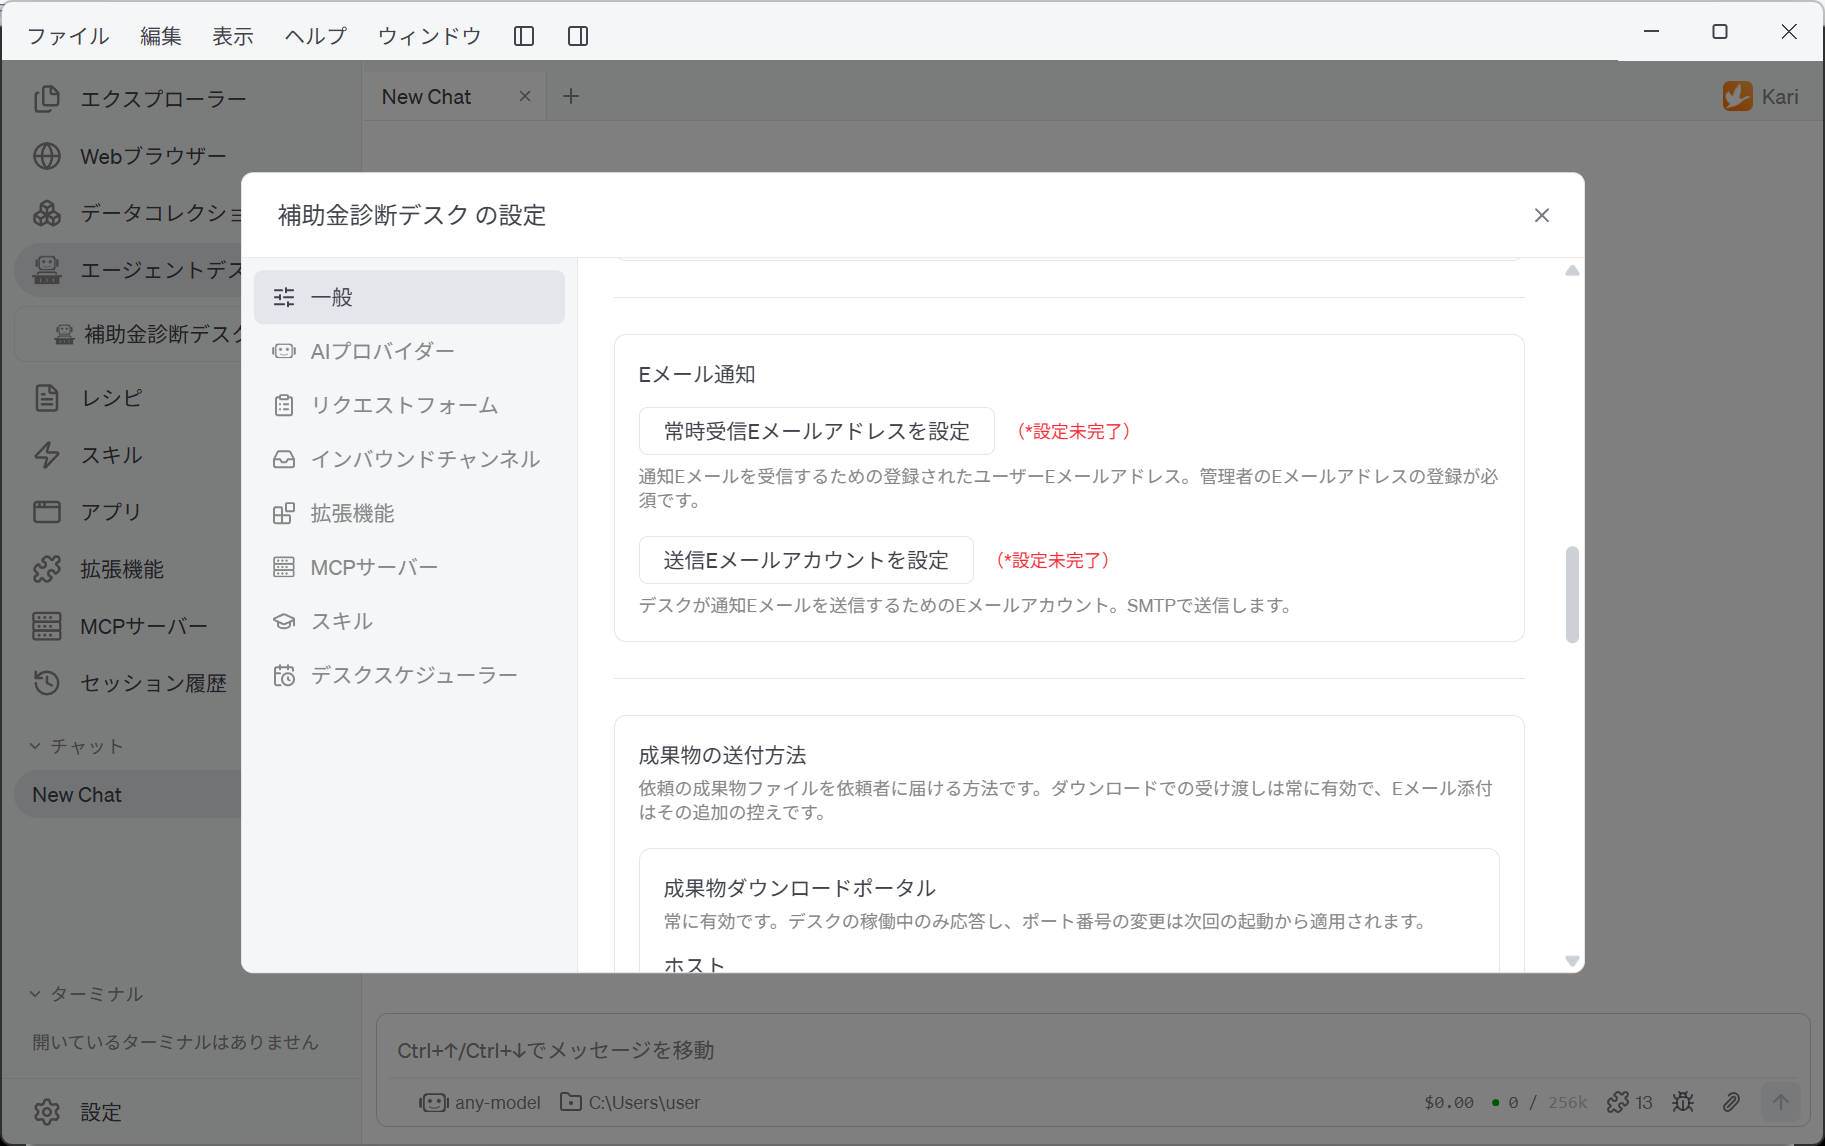
Register the administrator's address
Click Set the Always-Receiving Email Addresses.
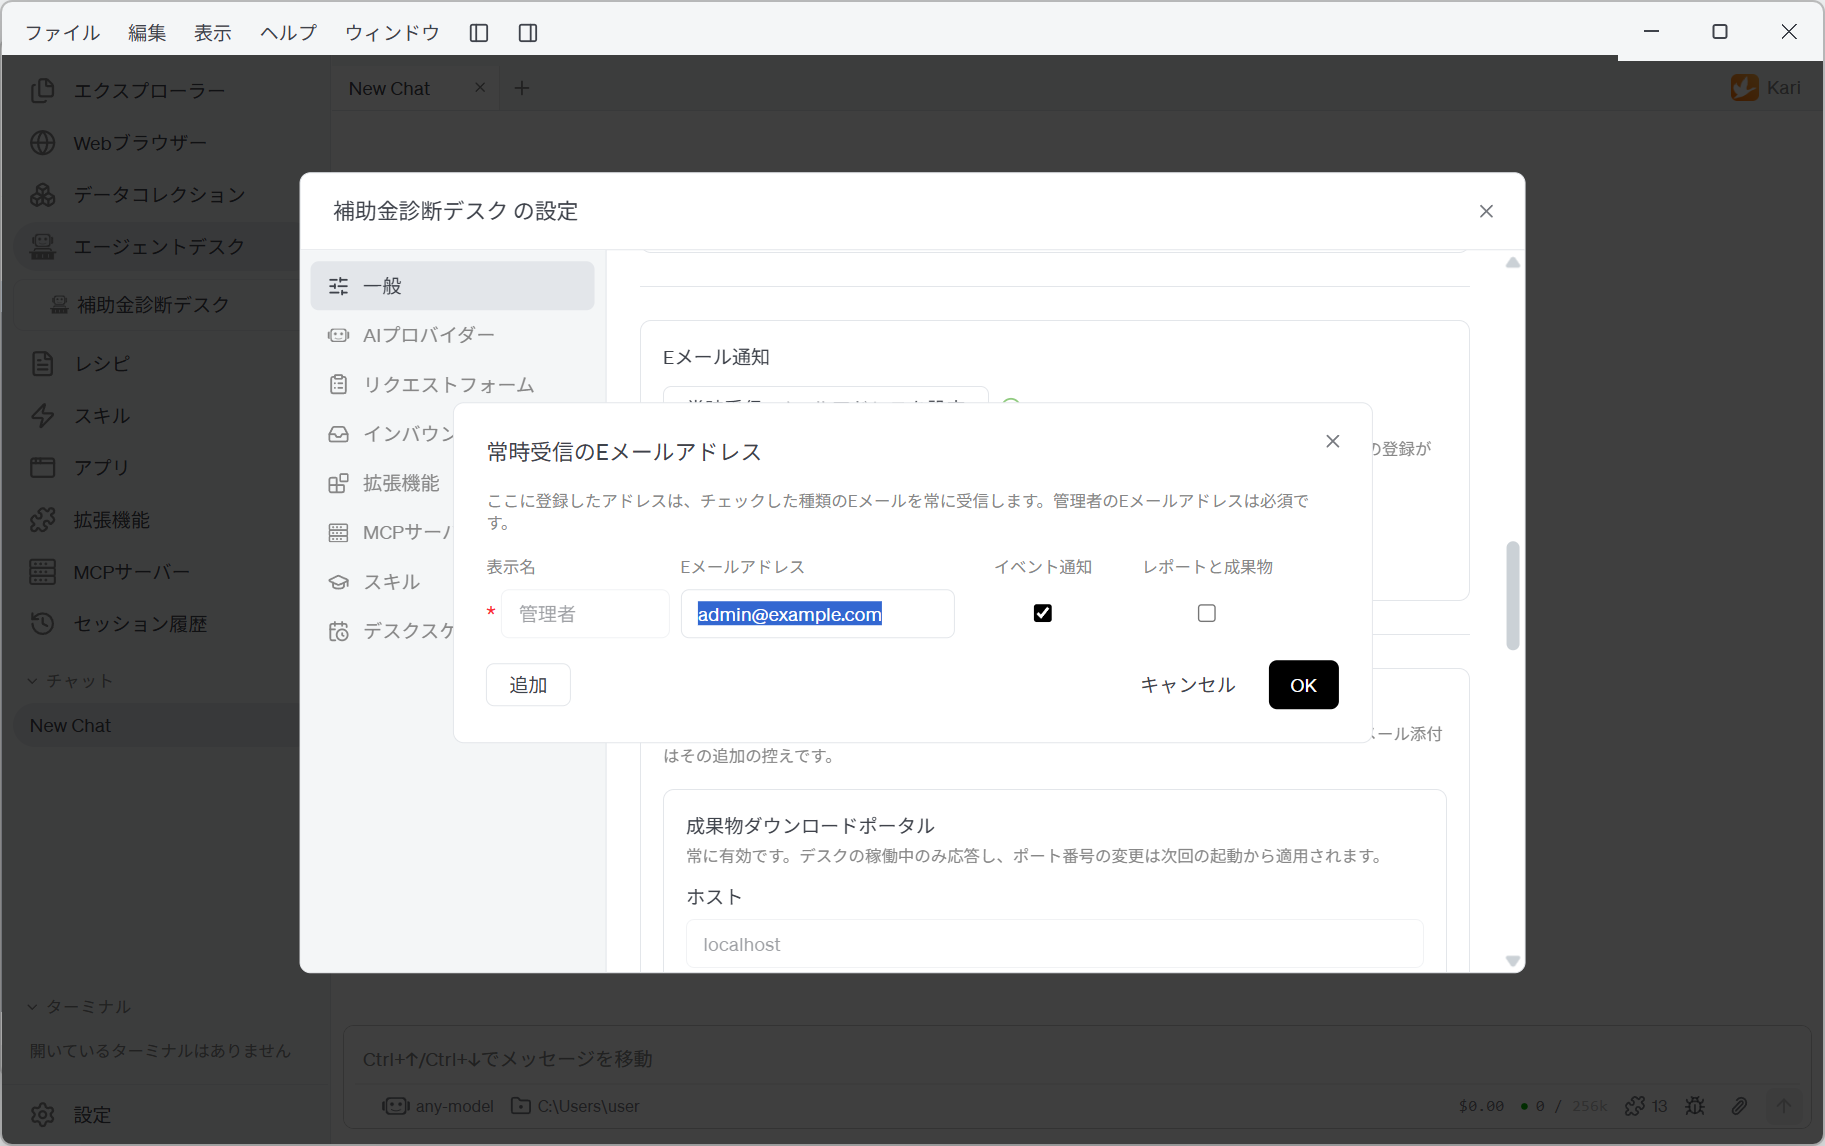
On the Admin row, enter a display name and an email address. Tick the kinds of mail it should receive.
| Kind | What arrives | Default on this desk |
|---|---|---|
| Event Notices | What happened at the turning points of processing, such as a failure | On |
| Reports and Deliverables | The result of a request, and the PDF it produced | Off |
If the administrator should receive the diagnosis report as well, tick Reports and Deliverables too. The requester receives the delivery notification at the address entered in the form regardless of this setting.
Add registers addresses besides the administrator's. Click OK when you are done.
Set up the sending account
Click Set the Sending Email Account, and you are asked which kind of account to use.
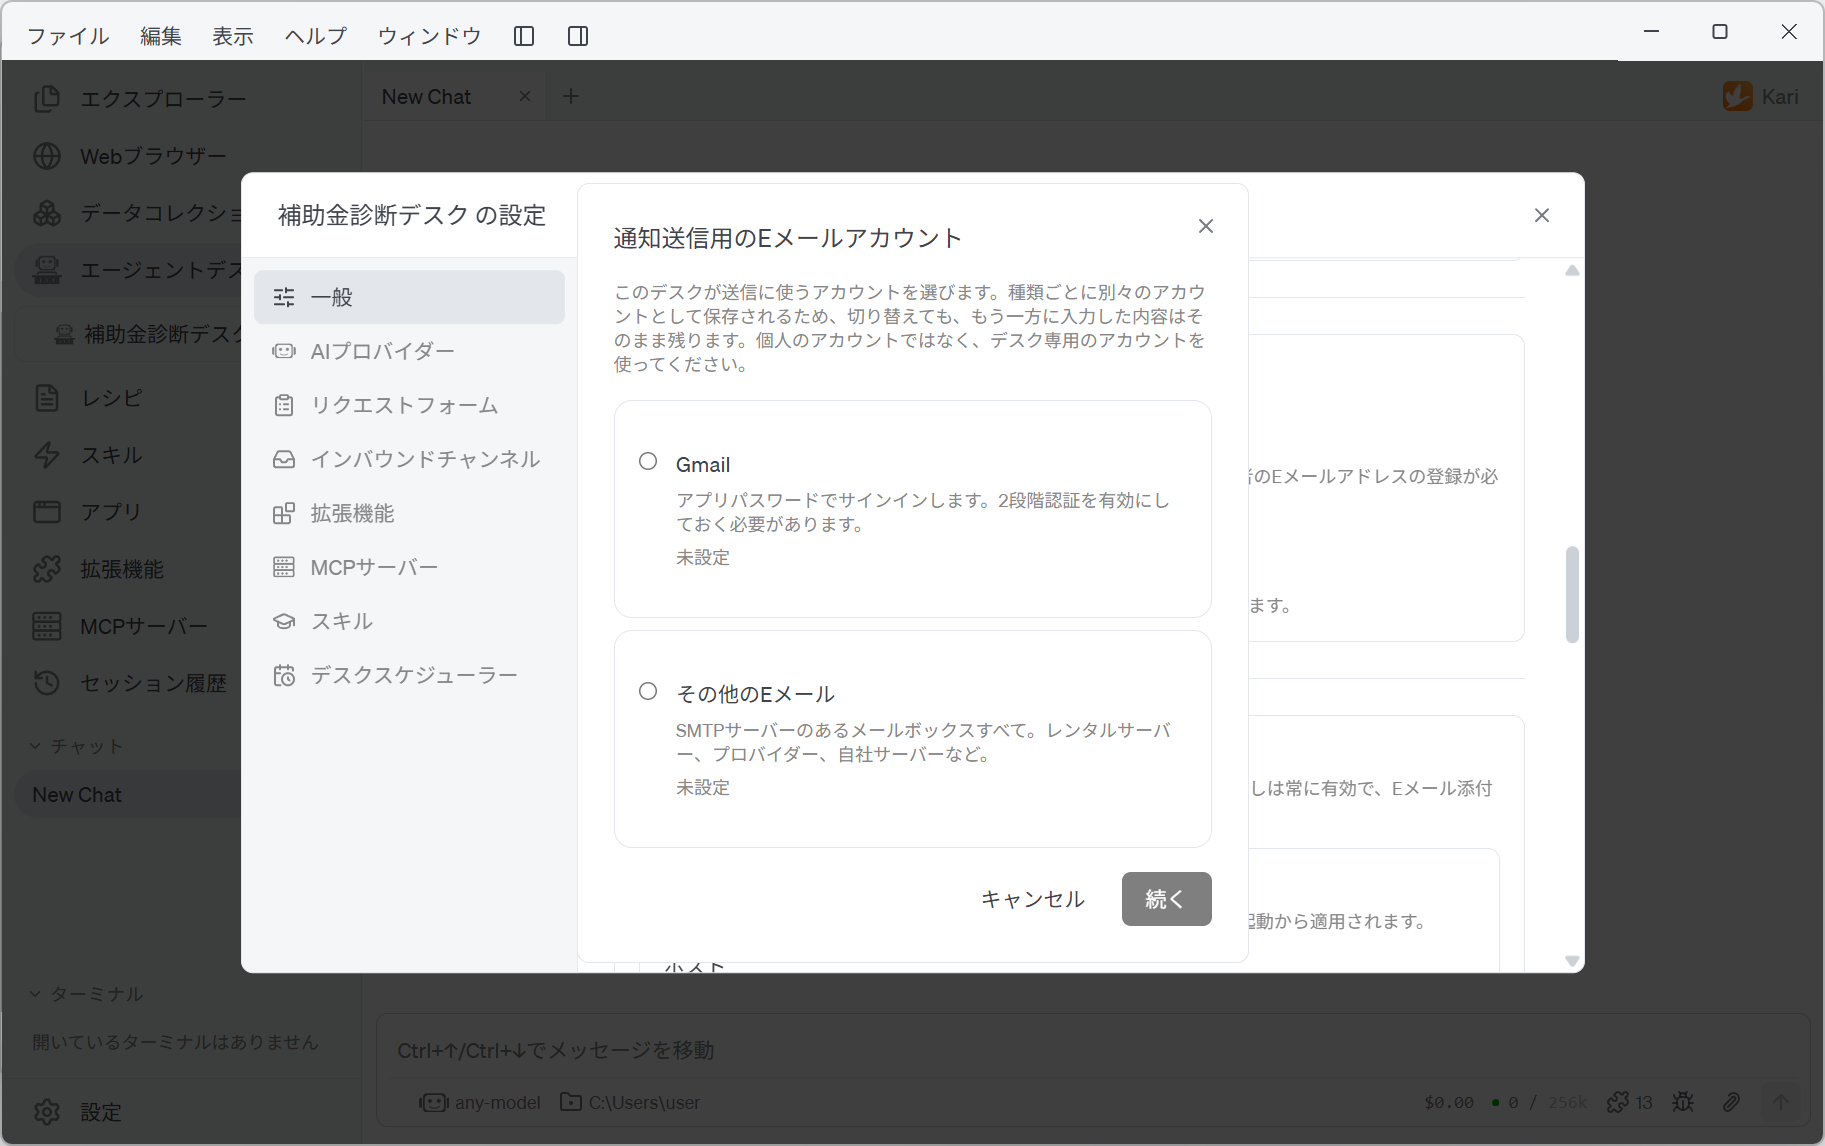
| Kind | When to use it |
|---|---|
| Gmail | Sending from a Gmail account. It signs in with an app password |
| Other Email | Any mailbox with an SMTP server — a hosting provider, an ISP, your own server |
A desk runs unattended and sends mail to requesters. Prepare an account that belongs to the desk, not to a person.
Using Gmail
Gmail will not send from outside with an ordinary password. An app password is required, and only Google can issue one.
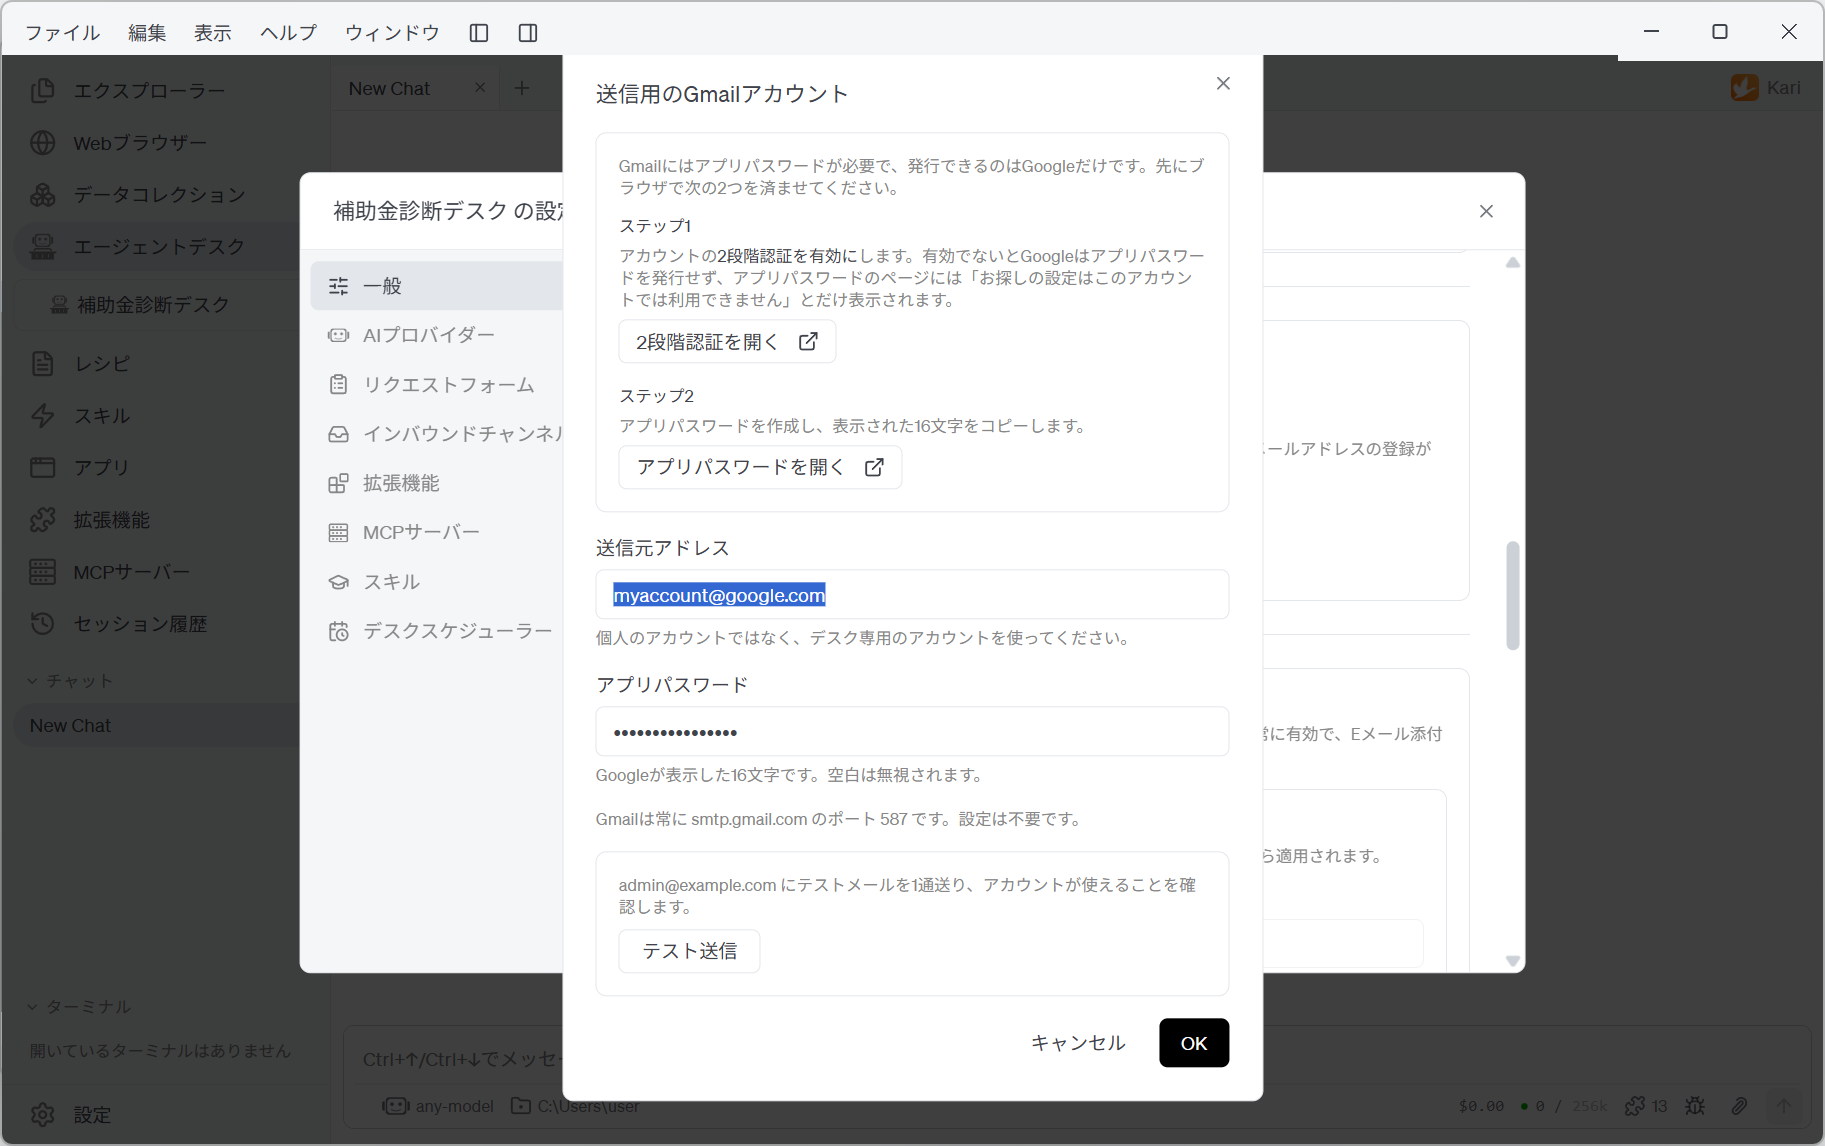
Follow the steps on screen and do these two in a browser first.
- Turn on two-step verification. Without it Google issues no app password, and the app password page says only that the setting is not available for this account.
- Create an app password and copy the 16 characters it shows.
Back in Kari, enter the sending address and the app password. The server name and port are fixed at smtp.gmail.com port 587, so there is nothing to set.
Using another email account
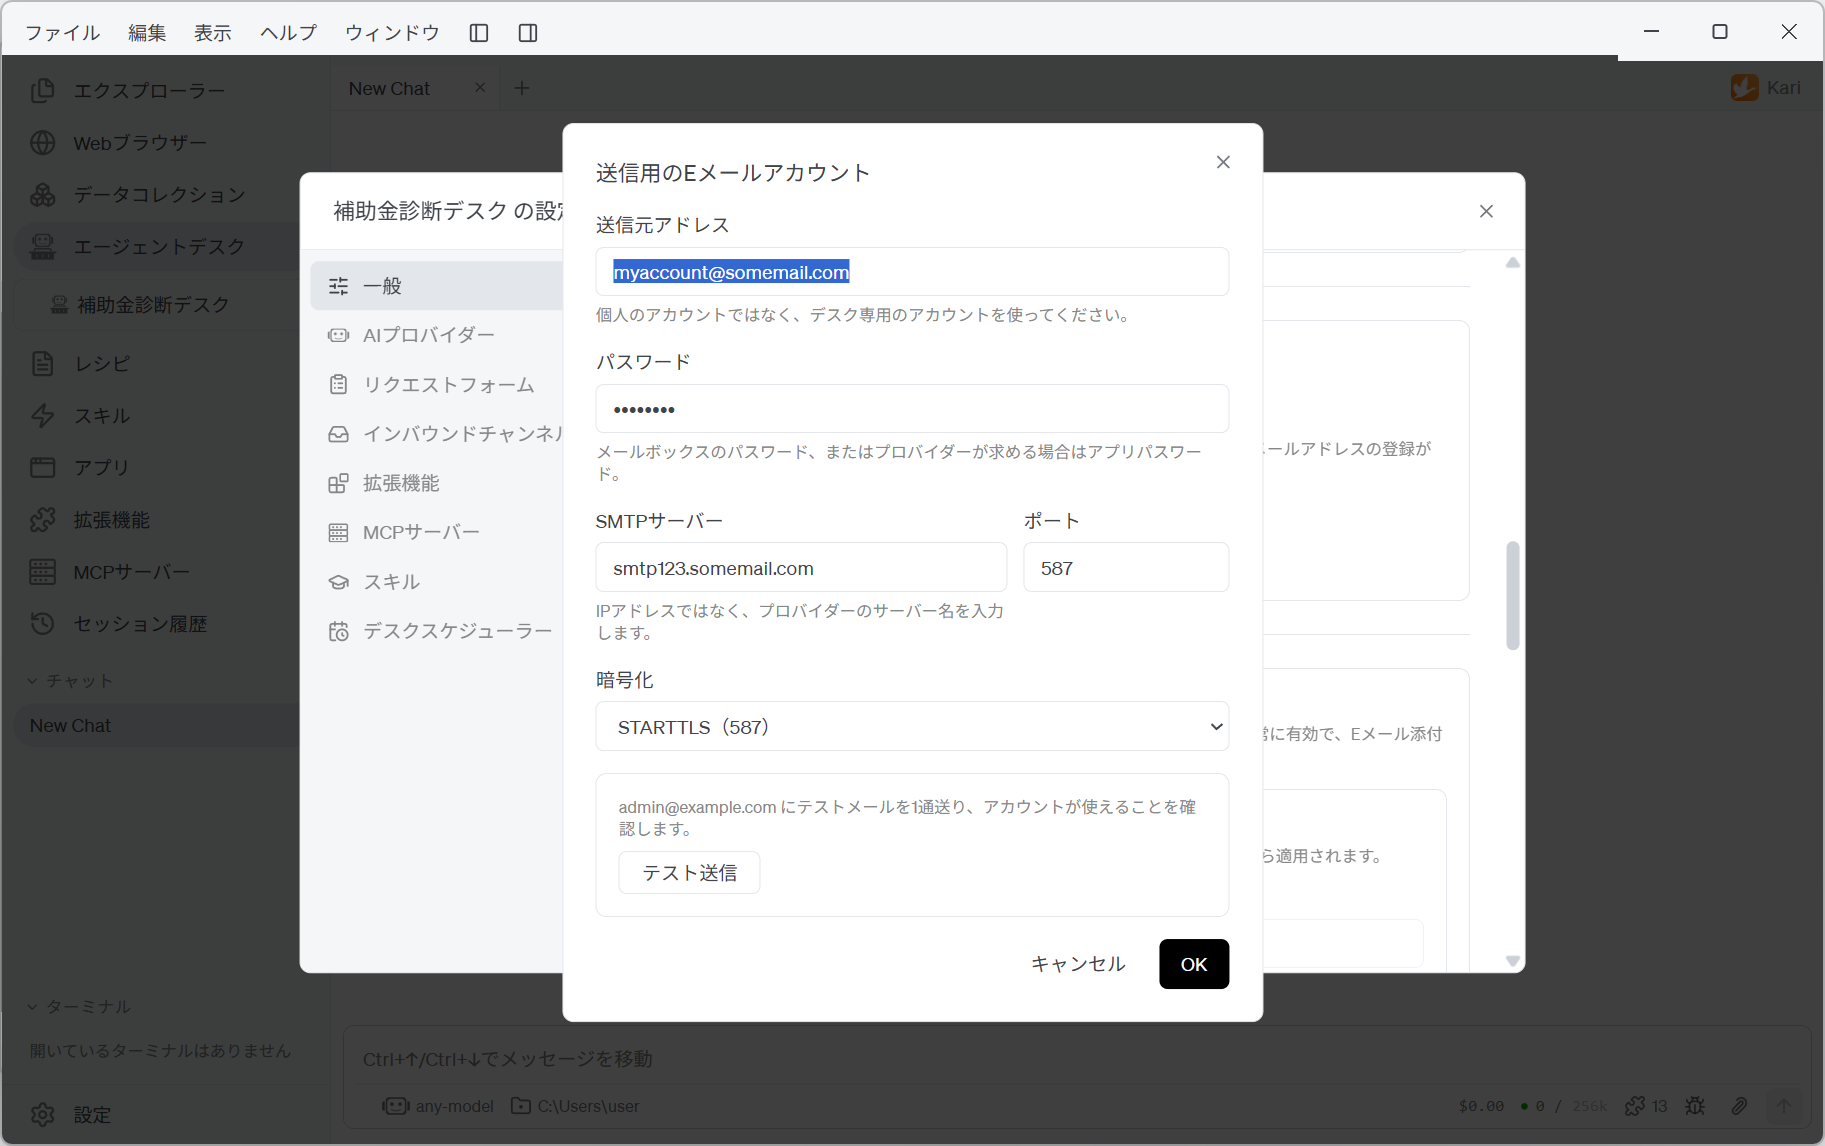
Enter the sending address, the SMTP server name, the port and the encryption (STARTTLS or SSL/TLS). The server name should be the one your provider gives (for example smtp.example.co.jp), not an IP address.
Confirm with a test message
When you have finished entering, click Send a Test. One message goes to the administrator's address you registered a moment ago.
- If it says it was sent and the message really arrives, you are done. Close with OK.
- "The mail server refused the account" means the address or the password is wrong. With Gmail, the usual cause is having entered the ordinary password.
- "The mail server could not be reached" means the combination of server name, port and encryption needs checking.
The test needs the administrator's address, so register that before running it.
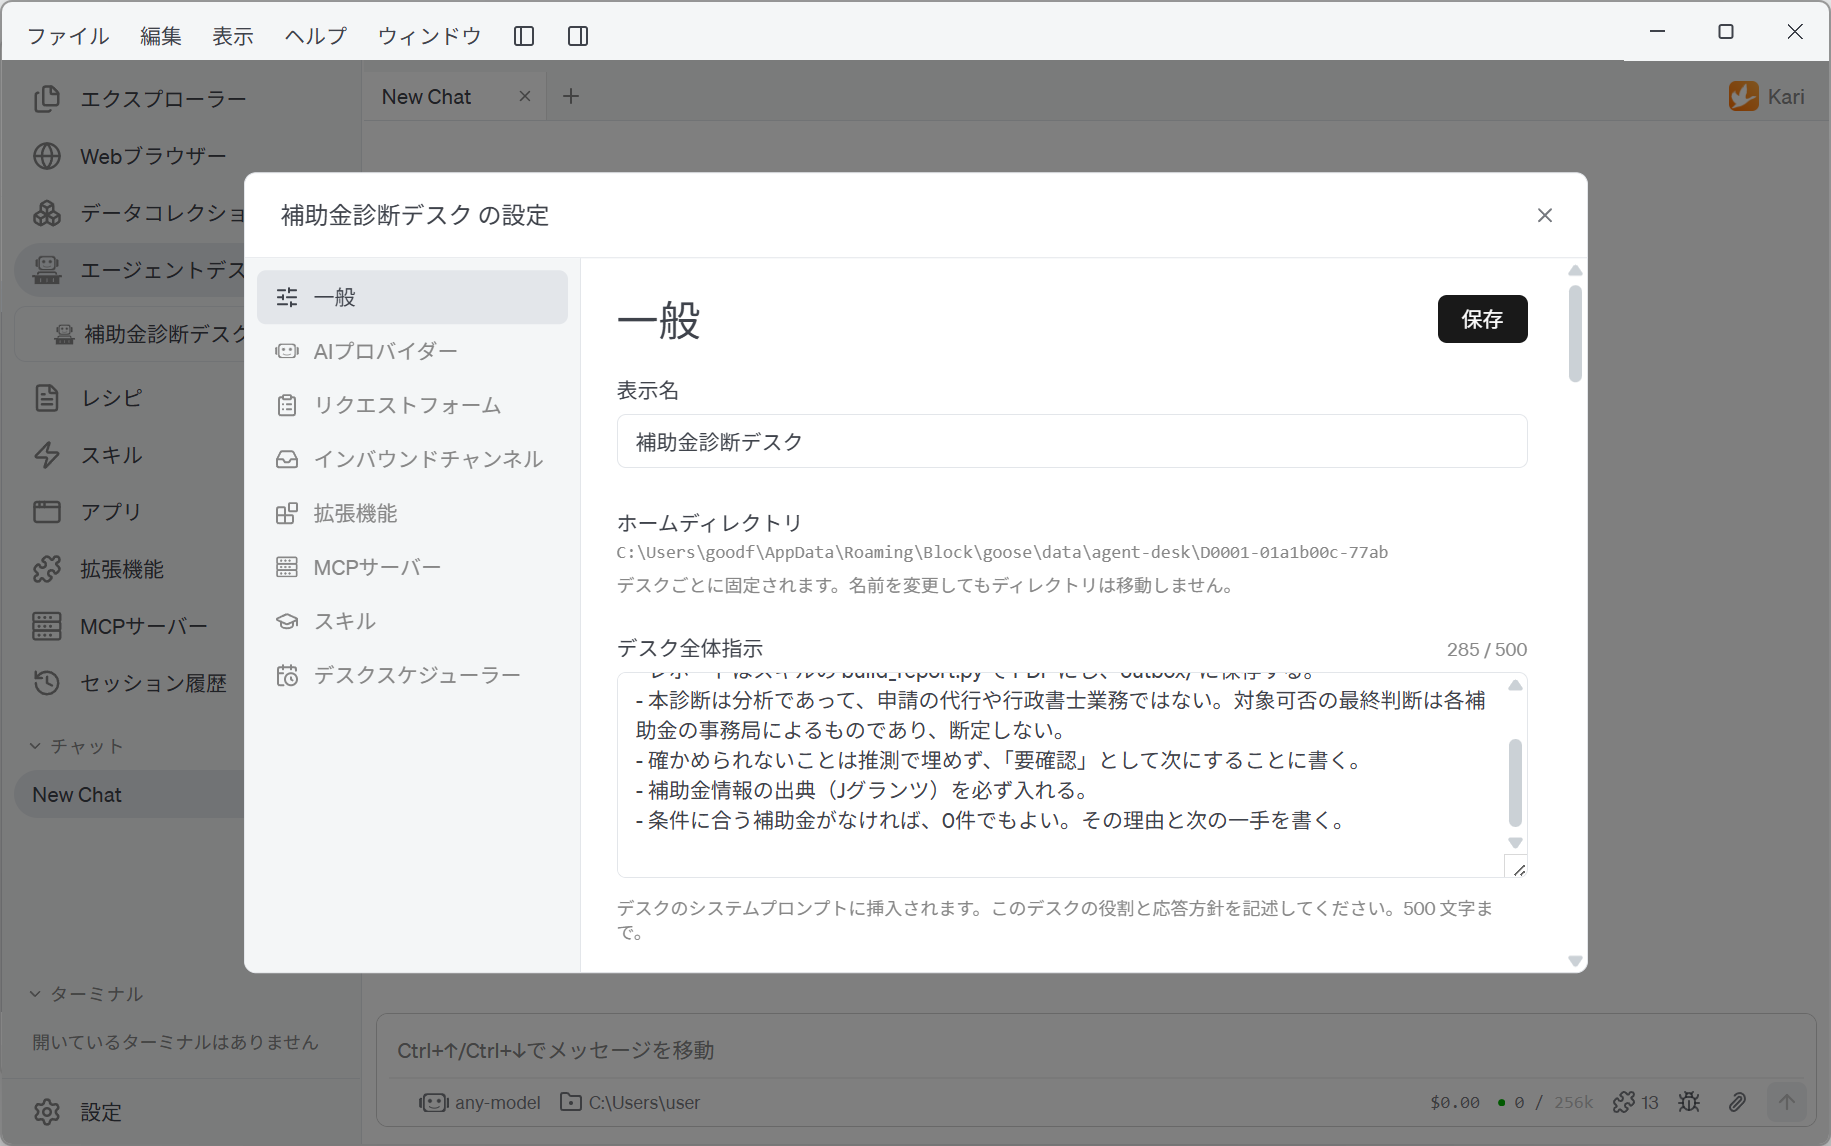
Finally, click Save at the top right of the settings window.
Next, go on to Checking the settings and starting the desk.