Importing the desk settings
Copyright © 2026GotoAI Inc.Based on the goose project
About this example
The corporate performance diagnosis desk compares one listed company's performance against its industry peers and delivers a PDF diagnosis report to the requester.
| What the requester supplies | The company to analyse (by securities code or name), the peers to compare it against (up to five, optional), and the email address to receive the result |
| What the desk works from | The annual securities reports filed with EDINET (Financial Services Agency), and a database of roughly 3,800 listed companies built from them |
| What the desk returns | A diagnosis report (PDF) comparing performance against industry peers. It arrives through the download portal and as an email attachment |
| Roughly how long | A few to a dozen or so minutes per request, depending on the AI provider and the number of peers |
This desk combines an MCP server (fetching outside data) with skills (reference data and working procedures). You import a desk that is already configured, so there is no form or skill to build from scratch.
The report this desk produces is analysis based on published annual securities reports. It is not an investment recommendation — no buy, sell or price target. The Desk Overall Instructions and the skill both say, in as many words, not to make recommendations.
The steps
| Step | What it covers |
|---|---|
| 1 | Importing the desk settings (this page) |
| 2 | Setting up the MCP server — obtaining an EDINET API key and adding the MCP server |
| 3 | Setting up email — the administrator address and the sending account |
| 4 | Checking the settings and starting the desk — choosing the AI provider and starting |
| 5 | Submitting a request — filing a request through the Web Intake Portal |
| 6 | Checking the result — the Monitor Console and the diagnosis report |
What you need
- Kari 0.7.4 or later.
- An AI provider that uses an API key. A desk will not run on a subscription (see Other settings).
- An EDINET API key. The next page covers how to obtain one. Registration involves verifying a phone number, so starting on it early saves waiting.
- An email account that can send over SMTP. Gmail, or any mailbox with an SMTP server.
Download the settings
Download the following file.
Download the corporate performance diagnosis desk settings
A .dsk file holds an Agent Desk's settings in one piece. This one contains:
| What is in it | Details |
|---|---|
| The desk settings | Display name 「企業業績診断デスク」, the Desk Overall Instructions, the extensions it uses (Python and Web Fetch), the ports, and how deliverables are sent |
| The request form | 「エージェントデスクデモ: 企業業績診断依頼フォーム」. Most of the file is the list of about 3,800 companies it carries |
| The skills | edinet-company-profiles (the company profile database and the script that queries it) and 「企業業績診断スキル」 (how the diagnosis is done, and the script that typesets the PDF) |
What is not in it: the choice of AI provider, the email account and its password, the administrator's email address, and the MCP server itself. Those are what you set up over the following steps.
Import it
Right-click Agent Desk in the left navigation and choose Import Agent Desk from Settings….
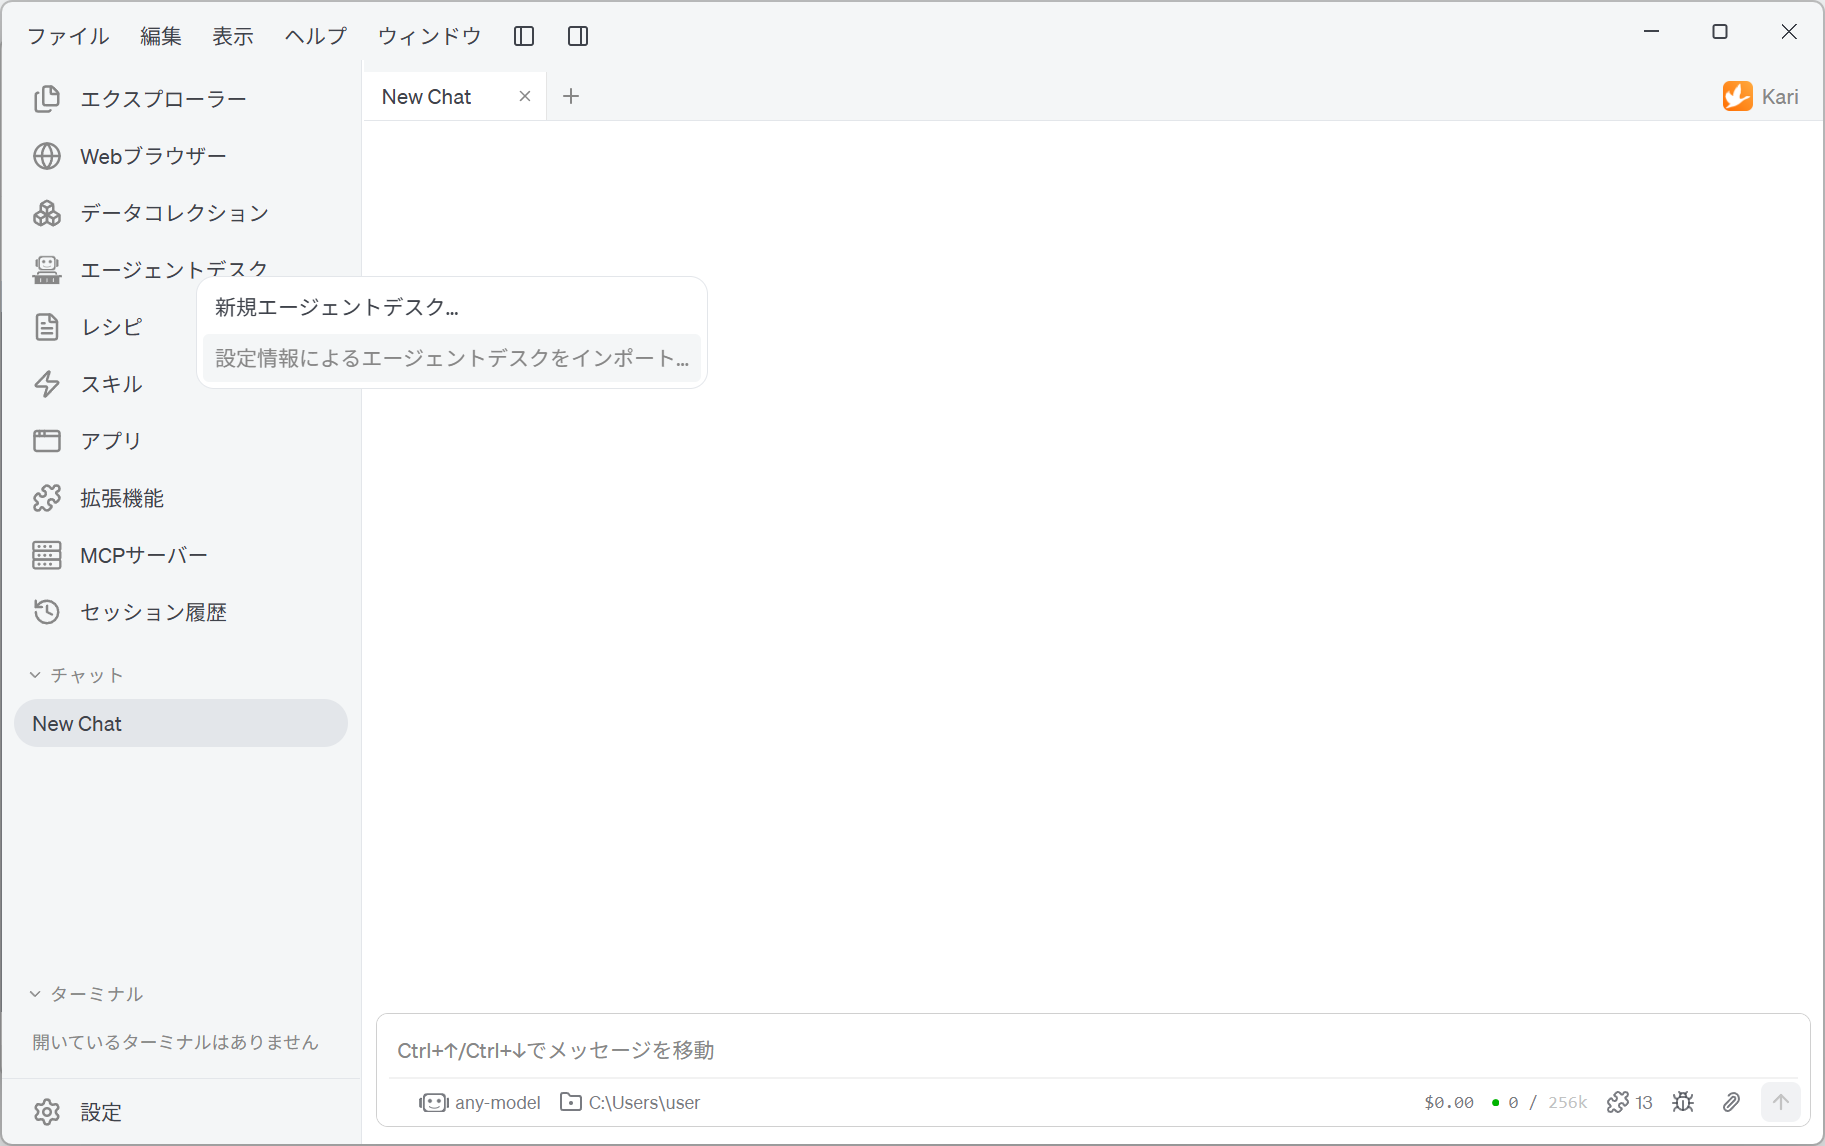
In the file dialog, pick the performances.dsk you downloaded. Once it has been read, 「企業業績診断デスク」 appears in the Agent Desk list.
Straight after the import, a message tells you what still has to be set:
Before starting it, check the AI provider and model, the sending email account, the administrator's email address and the MCP servers in its settings.
This desk uses 8002 for the Web Intake Portal, 18002 for the Deliverable Download Portal and 28002 for the Monitor Console. If any of those is already taken by another desk or application, it is moved to a free number automatically and the message says so. If that happens, read the port numbers in the following steps accordingly. The actual numbers are shown under General and Inbound Channels in the desk's settings.
Next, go on to Setting up the MCP server.